User Guide
This guide walks you through the mesoSPIM-control GUI and its core workflows — from moving a sample to running a fully automated tiled acquisition.
Overview of the interface
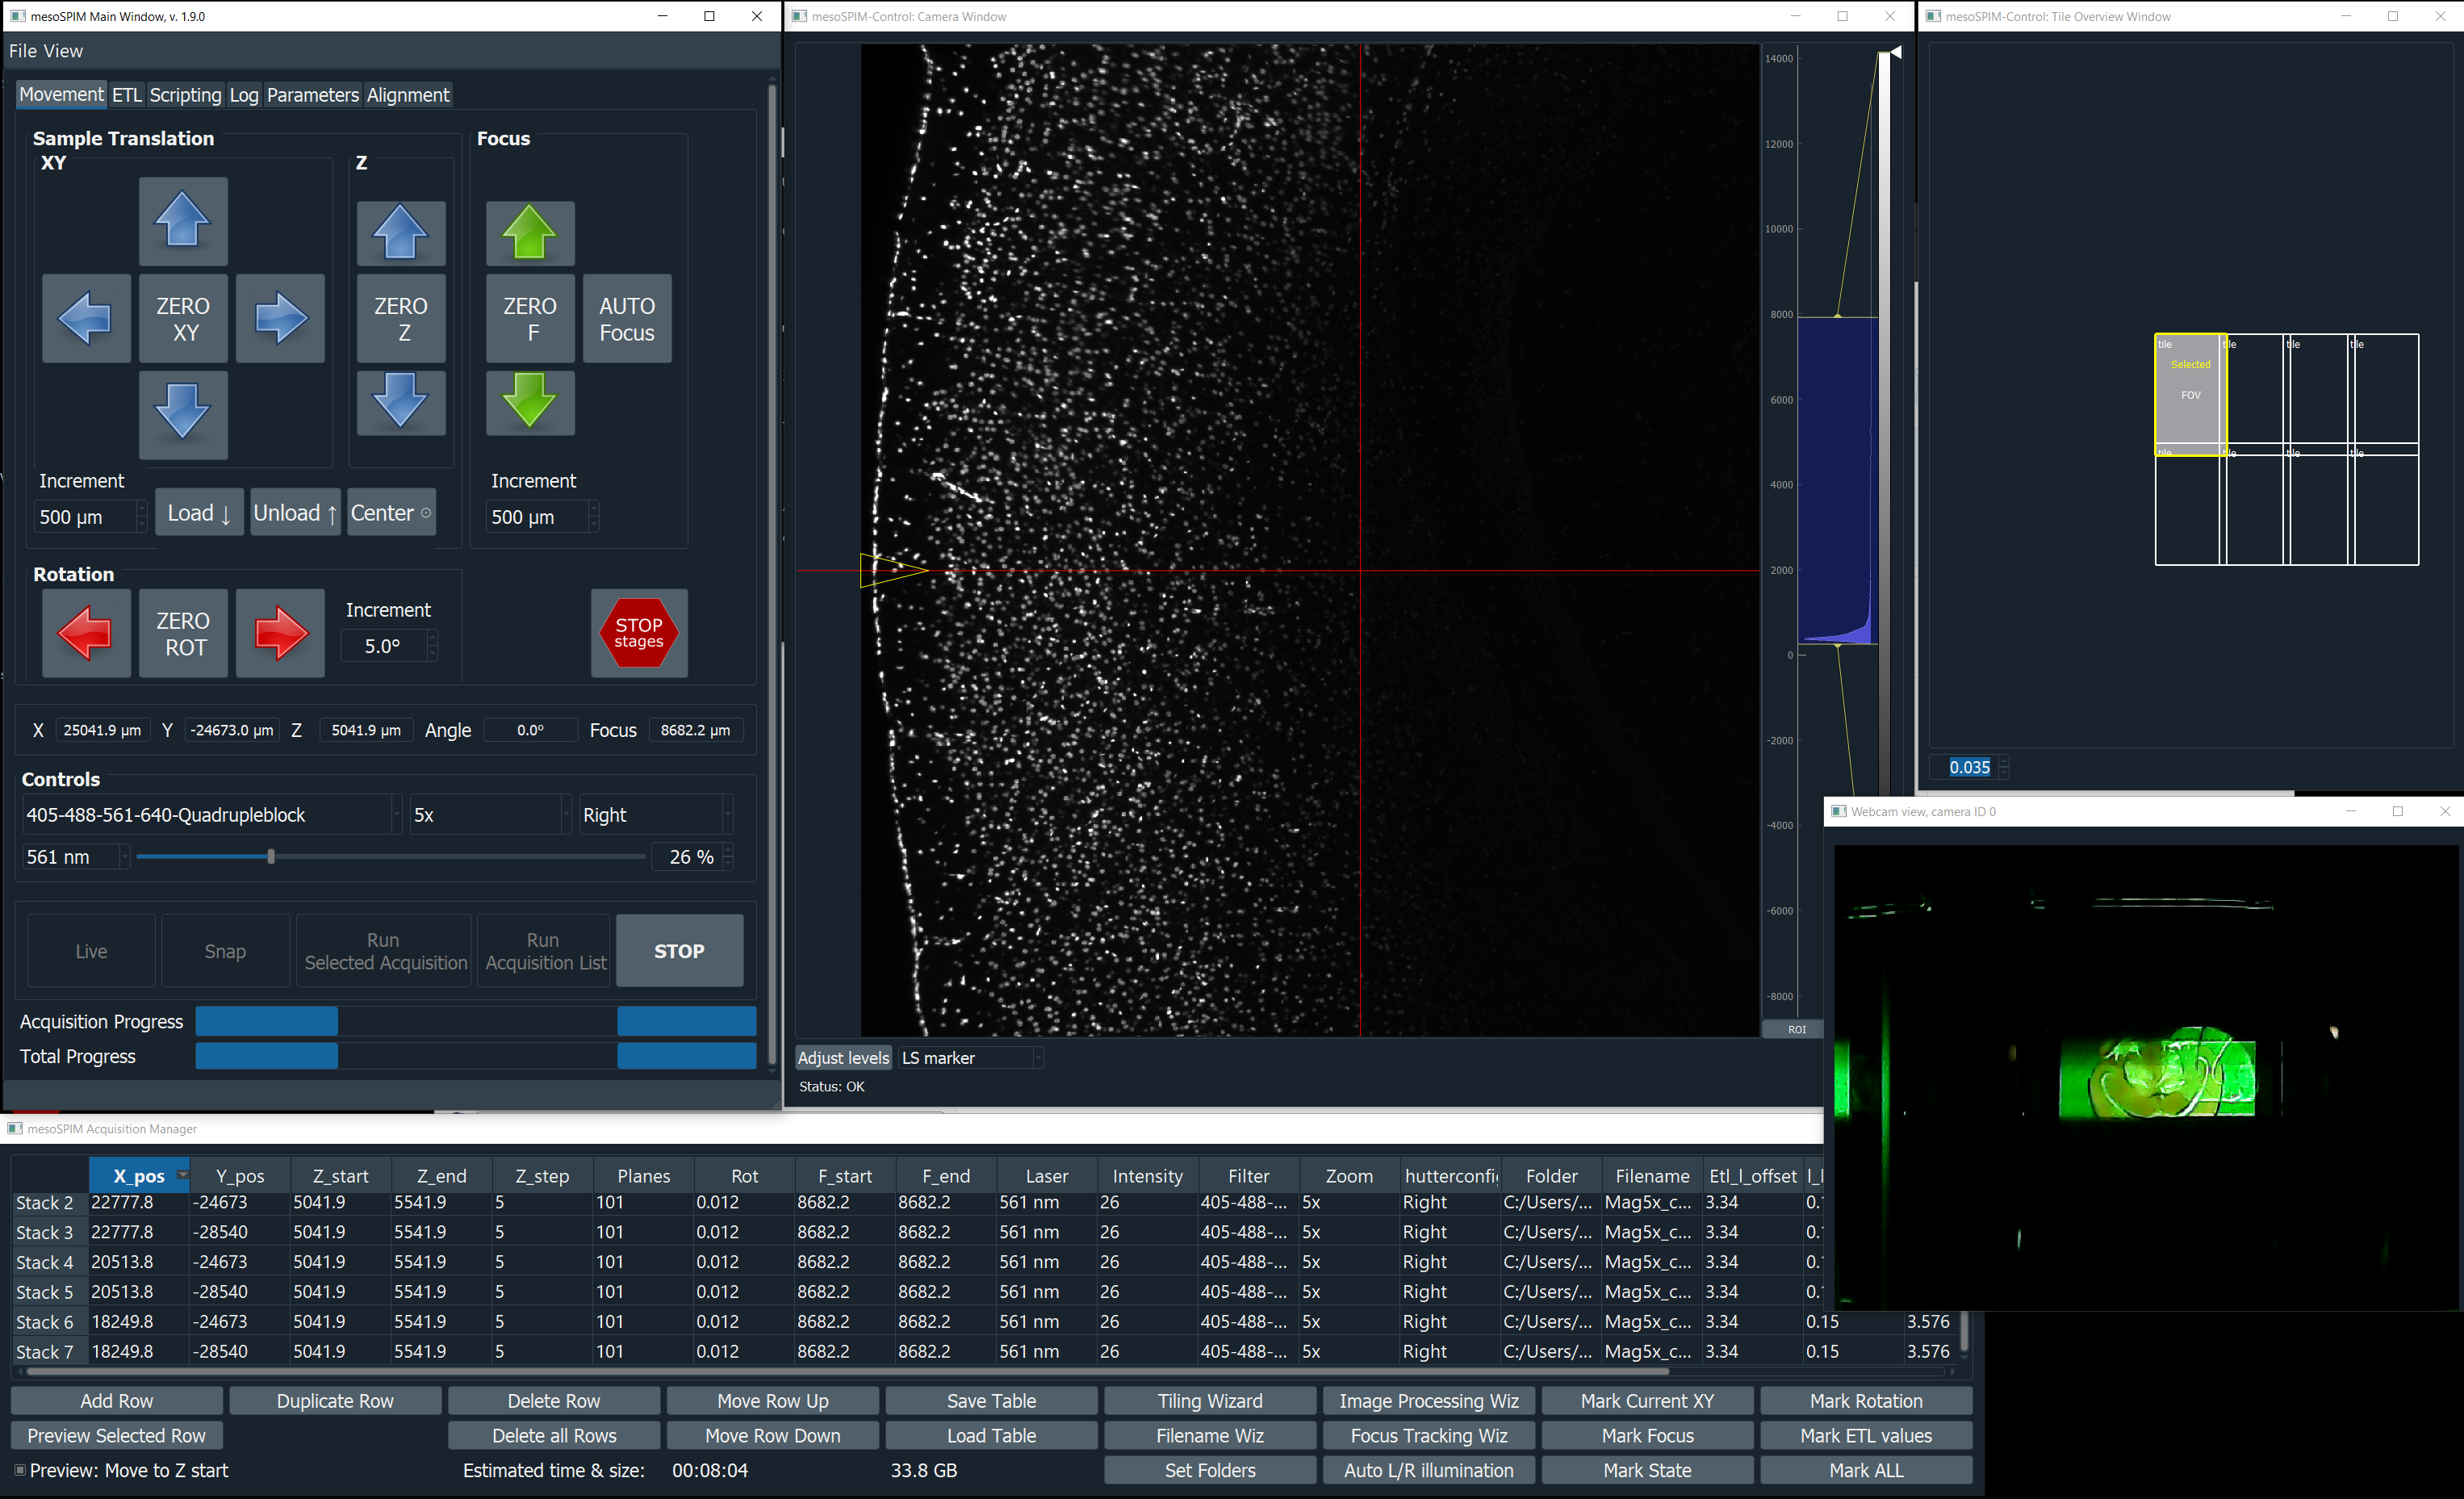
mesoSPIM-control v1.9 — Main window (left), Camera live view (centre), and Acquisition Manager (right).
The application has five main windows:
Window |
Purpose |
|---|---|
Main window |
Stage position read-out, manual motion controls, laser/shutter selection, and single-image snap. |
Camera window |
Live camera preview with auto-range intensity scaling. |
Acquisition Manager |
Build, edit, and run multi-position / multi-channel acquisition lists. |
Tile overview window |
Overview of tile positions and overlaps. |
Webcam window |
Optional USB webcam feed for sample monitoring (configurable in
|
Main window
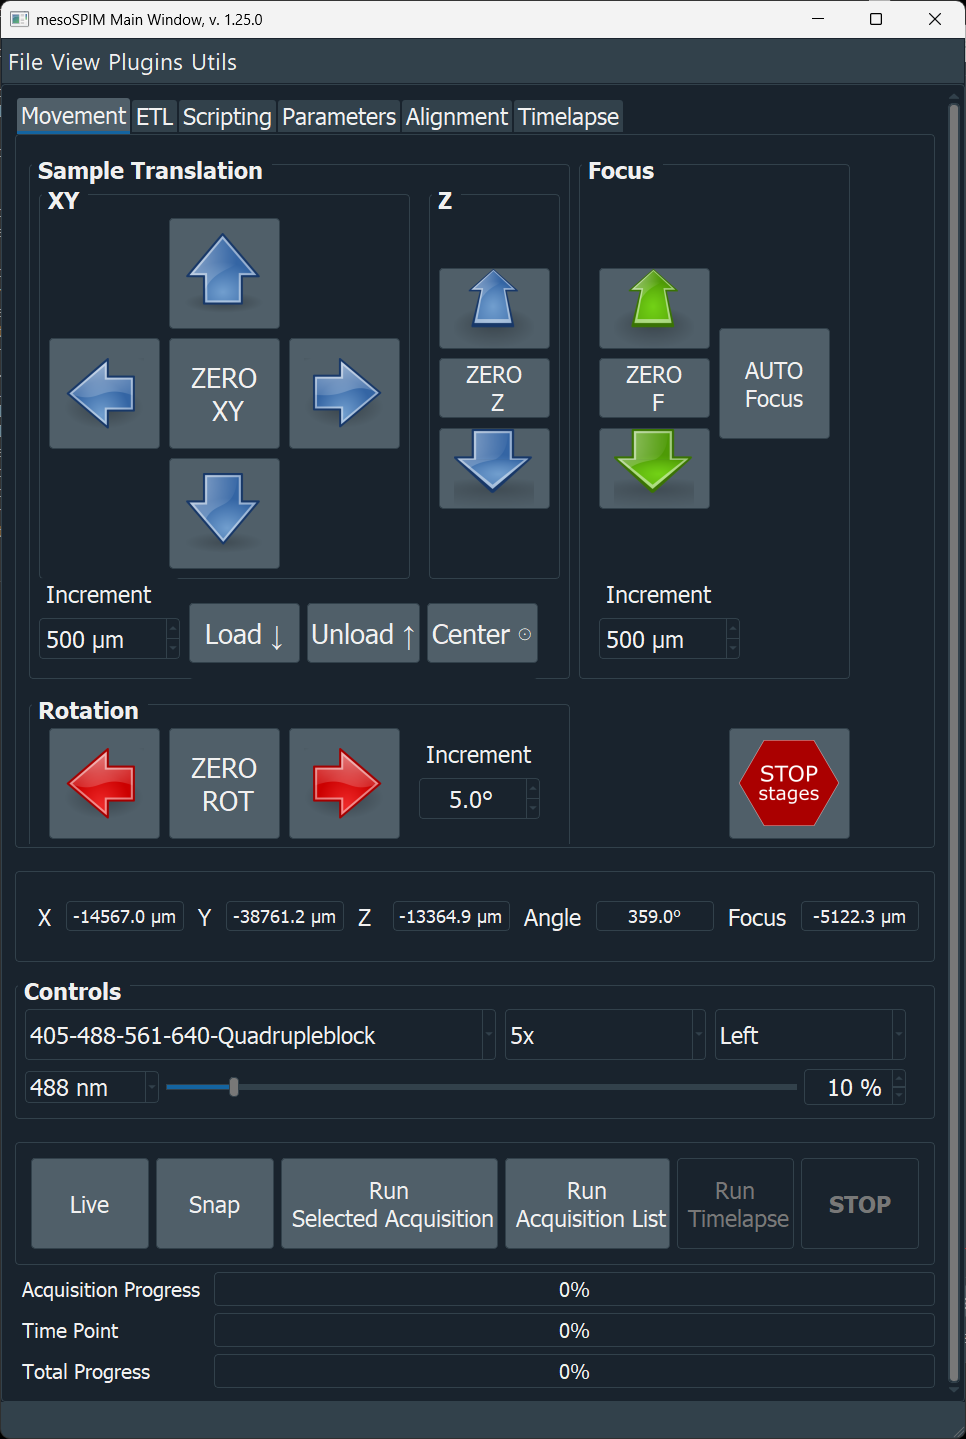
Main window (Movement tab): menu bar, mode tabs, stage controls, position read-out, illumination controls, and acquisition/progress controls.
Stage controls
The X / Y / Z / F / θ buttons move the corresponding axis by the step
size shown in the adjacent spin box. Button polarity and step-motion delays
are configurable in the Configuration file (flip_XYZFT_button_polarity,
button_sleep_ms_xyzft).
Note
The F axis controls the focus/objective position. If your setup uses a
revolving objective turret, set enable_f_zero_button: False in the
config to prevent accidental mechanical conflicts.
Shutter and laser selection
Use the shutter drop-down to choose Left, Right, or Both illumination arms.
Select the active laser from the wavelength drop-down. Only lasers listed in
laserdictwill appear.
Camera window
The live view updates continuously when a laser and shutter are open. Right-click the histogram to set intensity levels; the Auto button fits the display to the current frame.
Acquisition Manager
Building an acquisition list
Each row in the Acquisition Manager table represents one acquisition entry — a combination of position (X, Y, Z, F, θ), illumination (laser, filter, shutter), and file settings.
Common workflow:
Move the sample to the desired start position using the Main window.
Select the laser, shutter, filter settings for the acquisition entry. The live view will update to reflect the current settings, so you can preview before acquiring.
Click Add Row to create a new entry in the Acquisition Manager, or use the first entry to overwrite it.
Click Mark ALL to copy the current stage coordinates and light-sheet settings to the entry. Alternatively, use the Mark .. buttons to mark individual parameters (eg XY position).
Click small M button next to Z start / Z end / Z step values to mark the positions and step for a Z-stack. Small M button appears always on the right side of the cell that is being manipulated.
Choose the laser, filter, and shutter arm.
Enter the filename using the Filename Wizard.
Repeat for additional positions or channels.
For a tiled (mosaic) acquisition, use the Tiling Wizard to populate the Acquisition Manager.
Acquisition modes
Mode |
Description |
|---|---|
Live |
Live mode (preview). |
Snap |
Single image with current settings. |
Run selected acquisition |
Sweeps the sample from Z start to Z end in Z step increments while illuminating with the light-sheet, using the stage coordinates and light-sheet settings from the Acquisition Manager entry. |
Run Run Acquisition list |
Takes all stacks defined in the Acquisition Manager sequentially; this can combine multiple XY positions into a mosaic (see the Tile Overview window to plan overlap) and loop through multiple channels and illumination settings. |
Time-lapse |
Repeats the entire acquisition list at defined time intervals. Configured from its own Timelapse tab — see Time-lapse Acquisitions for setup, timing model, and progress indicators. |
Output file formats
Select the image writer for each acquisition entry in the file-naming wizard. Writers are part of the mesoSPIM plugin system; see Output File Formats for a full comparison (extensions, pyramids, compression, downstream compatibility) and configuration examples.
Processor chain
Image processors modify frames before they are shown in live view and before the same processed data is written to disk. They are configured from Plugins → Processor Chain — see Image Processing Plugins (beta) for the built-in processors, the Processor Chain window, and GPU acceleration notes. For plugin-author details, see Plugin System.
Running an acquisition
Click Run Acquisition List in the Main Window to start. Progress is shown in the status bar and log. To stop mid-acquisition click Stop.
Script window
The script window exposes the full mesoSPIM Python API. Scripts run in the same process and can read/write the instrument state, move stages, snap images, and iterate over acquisition lists.
A selection of example scripts is in mesoSPIM/scripts/.
Logging and troubleshooting
All session output is logged to a timestamped file in
mesoSPIM/log/, e.g.20241210-154845.log.Set
logging_level = 'DEBUG'in your config for ultra-verbose output.For live status, watch the terminal where you launched the software.
Further resources
ZMB Dozuki guides — start-up, setup, and acquisition walkthroughs.